Our Blog
PHOTO TIP: It’s the little things

Hello Everyone! This week we are going to continue our photo tips for everyday life…the tips in this posting can be used with both cellphone as well as traditional cameras. As we continue our series we love hearing your feedback! Remember…if you have a photo tip request or questions – let us know! Here are two important little tips that can greatly impact your photography ability on-the-go.
#1 Clean your lens
This may seem silly – but when was the last time you wiped down your phone or your camera lens? If you really think about it…our phones are constantly being held with our hands. Natural oils alone can leave their mark – not to mention the residue from that bag of chips that linger behind on your fingers. Make a conscious effort to clean your phone. Try using a soft clean micro-fiber cloth and wipe your camera lens off too. You’ll be surprised how much more crisp and clear your images may appear!
#2 Rule of Thirds
Now…there’s nothing wrong with having your subject in the center of your screen. This can actually be recommended if you’re photographing a group of individuals. HOWEVER…we’ve touched on this before, but using your “Rule of Thirds” can really bring in a whole new feel to your portraits. Positioning your subject at different sections of your frame is the easiest way to add motion and change the entire mood of your portrait. So what is the Rule of Thirds and what do we mean?
Well, the Rule of Thirds is essentially a grid across your camera frame. (most smart phones have this built in and you can turn it on and off in your settings) The “Rule” is to position your subject at the intersecting points of this grid. See the photos below as an example:

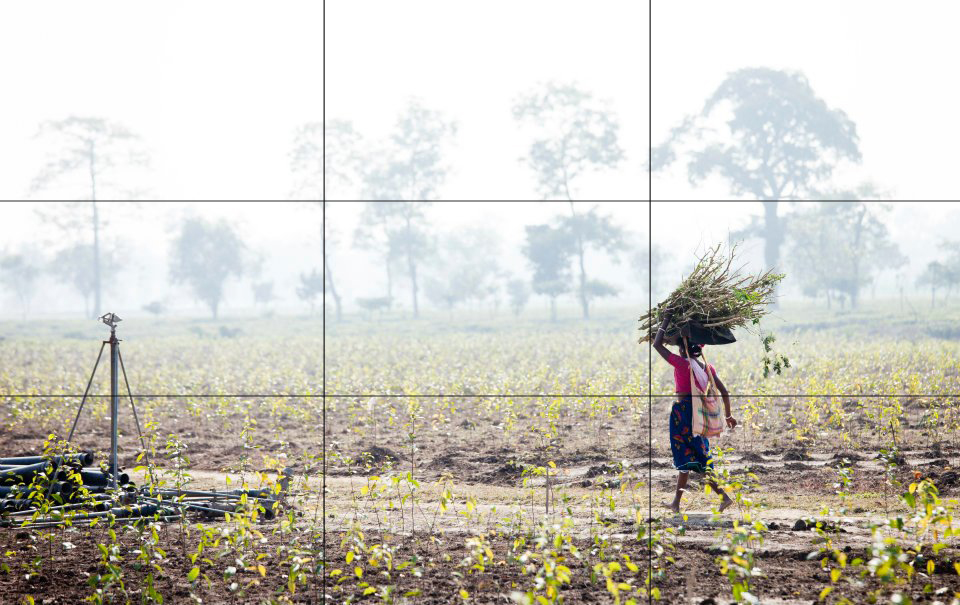
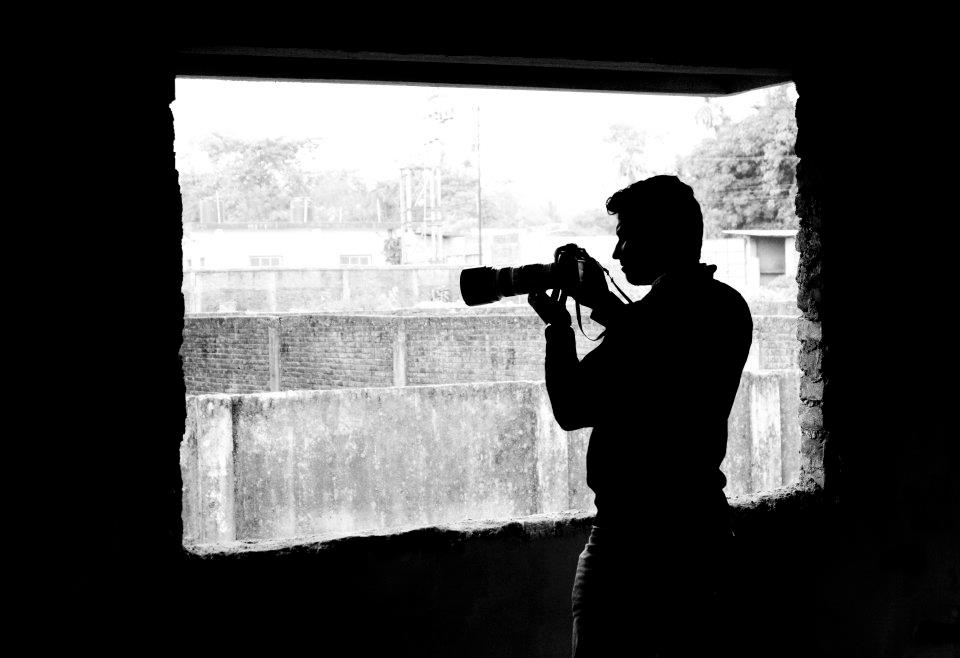
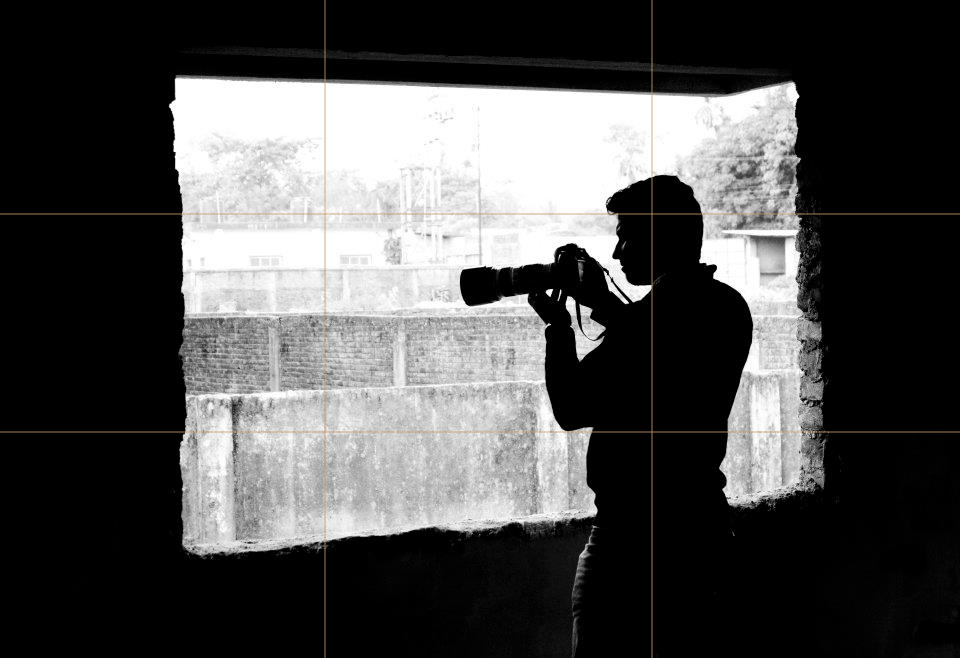
When images utilize this Rule of Thirds the portrait creates “motion”. You find your eyes moving across the entire photo. This rule can be applied in portraits, landscape, sports and so much more! We encourage you to play around with this and see how your photos transform!
Stay tuned..next week we will be launching a 2 week photo contest! Practice your skills and be ready to show off your favorite images!
How to Take Better INDOOR Photos with your Cellphone
When we scroll through our Social Media Newsfeeds we’re always surprised on how many indoor cellphone photos are posted where you can hardly see the individuals face! With this being said – obviously you want to photograph and share photos of your loved ones – but how can you do that when the lighting is just terrible indoors? Well…that’s what we’re going to discuss with you today as we continue our blog series on photo tips for everyday life.
In the ideal situation….
When you can – look for the window! If you can put your subjects backs to the window – this gives you the SUPER bright background and VERY dark shadows on your subjects faces. Instead of putting the back of your subjects to the window, turn them around. Let the light from the window light their faces as you stand with your back to the window instead as you snap the shot. (Plus, you’ll get a beautiful catchlight in the eyes too!)


…What about when there isn’t enough space in front of the window?
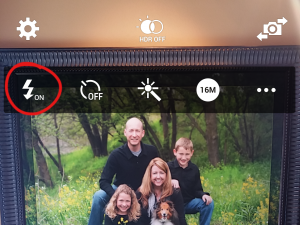
If you HAVE TO put the back of your subjects facing the window…what do you do? Well..this is when your phone flash comes in handy. Typically, we recommend staying away from “on-camera” or “on-phone” flash due to its harshness. However, in this circumstance – it’s your best option. So turn the flash on your phone from off/or Auto to ON to make sure it goes off when you snap the shot.
Not sure how to work you phone flash?
Let us show you…
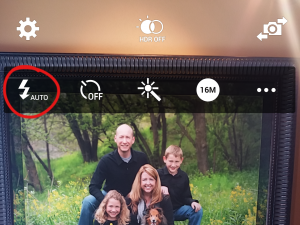
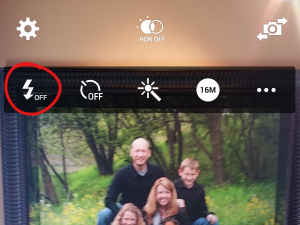
SAMSUNG
To access your flash – hit the settings wheel on the top left. Simply tap the flash icon to switch through your options. For most Samsung users, keep in mind – depending on what kind of ambient light (light from other sources in the room) it might automatically adjust to balance the light from behind. Be sure to try a shot before you turn your flash on – you MIGHT not need it.
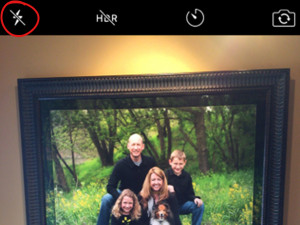
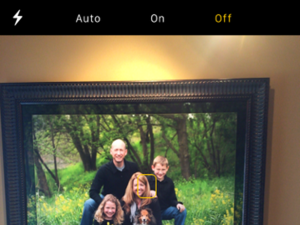
iPHONE
To access your flash – hit the flash icon on the top left corner – this will bring to your flash option menu. From here you can tap “Auto”, “On” or “Off”. Cellphone cameras have come a long way. Similar to the Samsung products depending on what kind of ambient light (light from other sources in the room) it might automatically adjust to balance the light from behind. Be sure to try a shot before you turn your flash on – you MIGHT not need it.
Stay tuned for the next photo tip in our series for everyday life coming out next week!
The Power of LIGHT! How to Eliminate Harsh Shadows from the Sun.
Our latest tip can be used in everyday photos using both cellphone, point and shoot, as well as DSLR cameras. David requested that we cover the best way to eliminate harsh shadows. Today’s post covers the topic of lighting and how to eliminate harsh shadows from the sun!
Every so often when a client sees their beautiful portraits they will exclaim:
“How come my photos never look like that?”
“What can I do to make my pictures better?”
Here I want to address that very question with one simple tip: LIGHT. A properly lit image can make a difference between a bad or even mediocre picture to a beautiful portrait.


Since the average person doesn’t carry around a “Power Light 1500R” with them everywhere they go, the next best thing is knowing how to use natural light properly. When you’re at a family function and you’re asked to take a picture – where do you stand the group to have the best light? The myth is to put them directly in the sun so their faces are lit – this is only a good idea if you want everyone to be squinty and blind by the time you take the photo!
Instead of this scenario, try putting the group under a nice big tree with the sun positioned behind them and the big open sky in front of them. Standing under the tree blocks the downward light that causes unflattering shadows on one’s face. Having the sun coming from behind the subjects allows for nice backlight rather than harsh direct light. The most important element of this scenario is the open sky in front of the subjects. This allows for beautiful soft light to reflect on the individual’s faces as well as creating a catch-light in their eyes bringing them to life.
So for your next family gathering or photo adventure, be sure to keep this in mind. You will be shocked as to how big of a difference it really makes!
How to Take Better Sport Photos with your Smart Phone!
Okay…so this is a little bit more of a MYTH Buster. People always ask us how they can take better shots of their kids playing sports on their cellphones. The truth of  the matter is – there is no easy “one-size-fits-all” fix to taking decent action shots on your phone. In most cases it’s a lost cause. Honestly, you might be better off enjoying the game your child is playing in rather than fighting with your phone and constantly checking to see if your shots are turning out. However, there are a few things you can consider doing for those who are determined to take better shots…
If you’re outdoors – Try keeping the light behind you.
If possible, always keep the light source to your back – this allows your subject to be well lit and avoids too much sun-glare across your action shot.
Get as close to the action as possible!
Try to avoid using the digital zoom in your sport shots. You will start to lose quality as you zoom through your phone. Instead use your feet! Get as close to the action as you can and crop your photo later.
Useful tools built into your phone:
- Burst Mode – Gives you the opportunity to capture a consecutive set of photos per second. This helps with athletes in action!
- Grid – Visually divides your potential image into horizontal and vertical thirds. Place your important element along these lines and at intersections for better pictures!
- Exposure Lock – This allows you to find the light exposure you like, and lock it in for the rest of the photos you take in that series. This is very helpful in lowlight situations!
Minimize the distractions in the frame.
If you keep the targets in your photo to a minimum it will allow the lens to focus correctly and give you the highest quality photos.
Keep taking the shot!
When it comes to cellphones it’s hard to tell if the photo turned out perfectly or not. Instead of just hoping it does – go ahead and snap a few more shots! That’s the beauty of digital photography; it allows you to make mistakes. So to ensure you get the best shot you can, always take multiple photos and don’t erase them until you load them onto a larger screen.
Best of luck on your Sport Photos on your Cellphones!
Stay tuned for our next posting….all about light and eliminating harsh shadows from the sun!
Built-in Phone Editing – How to Use it!
We’re so excited about your positive feedback from our new blog series on everyday photo tips! This update goes along with improving your cellphone photos. Once you have an okay shot – then what? How do you make it perfect?
In this day and age there are TONS of photo apps that you can add on your phones. How can you choose? Everyone has their favorites, some are free, some you need to pay for – but what many people don’t know, you actually have basic photo editing capabilities built right into your phone!
Samsung and iPhones alike both have these options and we will do a quick walk through. (Each brand and phone generation might look a little different – but almost all have these standard built-in abilities)
First…Open your gallery on your phone. Once you’ve selected the photo you would like to enhance, simply hit the edit button.
SAMSUNG

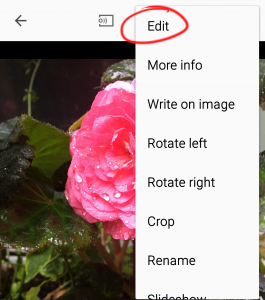
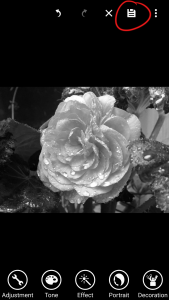
To access your editing software within your phone tap the three dots and select “EDIT”.
IPHONE

To access your editing software within your iPhone simply hit the “EDIT” button on the top right.
Cropping
We talked about the importance of cropping in our last post – but cropping is a wonderful way of deleting the distracting backgrounds of an image. Zooming in often can make a big difference between an okay to great photo!
SAMSUNG
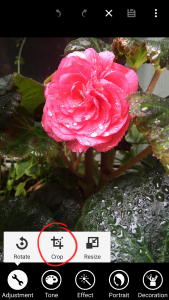
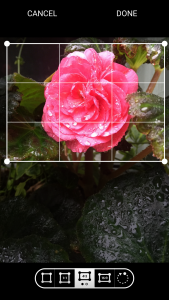
Once you select the crop tool – you have the option of selecting the ratio as to which you would like to crop the image. It will default to the ratio your phone already shot the image. If your goal is to demonstrate size, cropping is a great way to show perspective. Be sure to select “DONE” on the top right of your screen to continue.
IPHONE

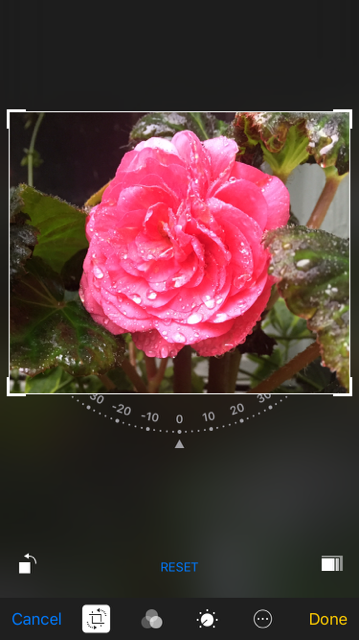
Once you select the crop tool – you have the option of selecting the ratio as to which you would like to crop the image. You can access this on your iPhone with the little boxes on the bottom right. If your goal is to demonstrate size, cropping is a great way to show perspective.
Tone: Brightness, Contrast, Saturation, Temperature
These tools are the best for quick and easy enhancements. Be creative and have fun! If the photo seems dark, brighten it up a bit. Or if a photo is very bright – sometimes boosting the contrast can make a huge difference.
SAMSUNG

On your Samsung devices simply drag your finger back and forth to see the difference.
IPHONE
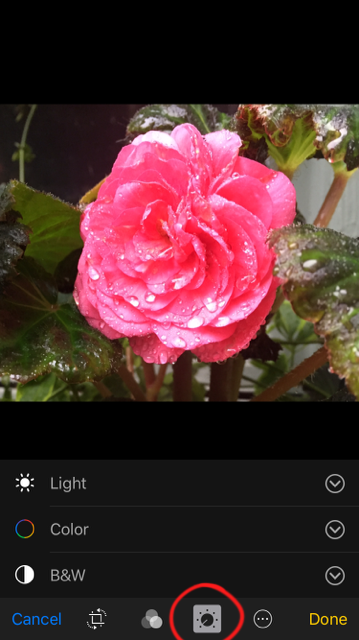
On your iPhone devices simply select the aspect you would like to change and drag your finger back and forth to see the difference.
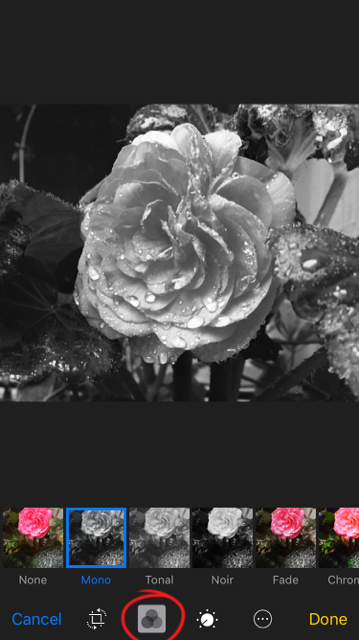
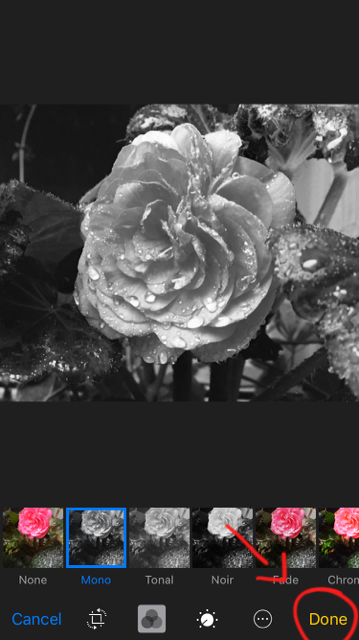
Effect
Just like many of your social media sites like Instagram and photo editing apps, your phone also has built in filters. Play around with these filters to find the best way to portray your photo!
SAMSUNG
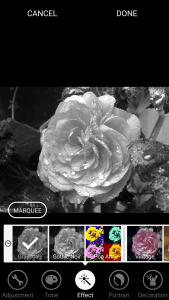
IPHONE
Don’t forget to save your work once you are done!
SAMSUNG
IPHONE
Join Our Newsletter
Stay up to date on our latest happenings and promotions here at the studio!